Creating an Action Workflow
Action workflows are created in ‘Manage Actions – Action Workflows’ and are made up of one or more steps. First, you create the steps, then you add them to a workflow and associate that workflow with a checklist.
To create an action workflow step:
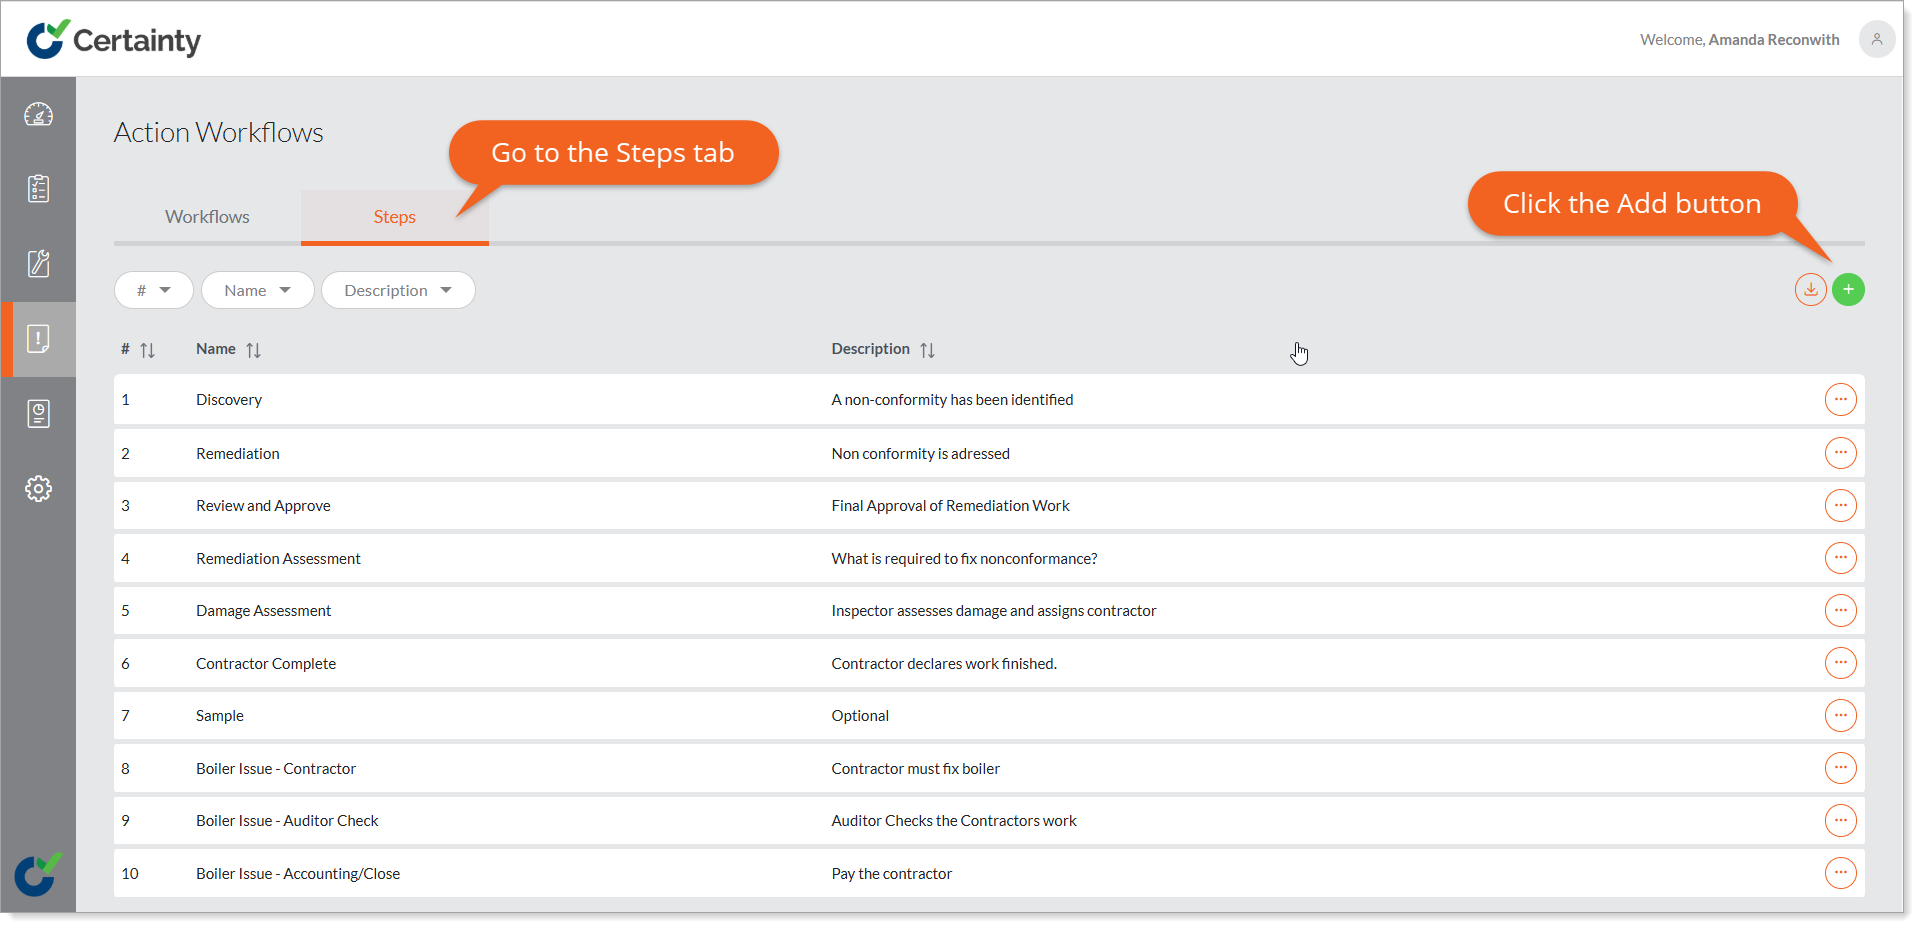
- Go to ‘Manage Actions – Action Workflows – Steps'.
- Click on the green ‘Add’ button at the top right of the table to open the ‘Add Action Workflow Step’ page.
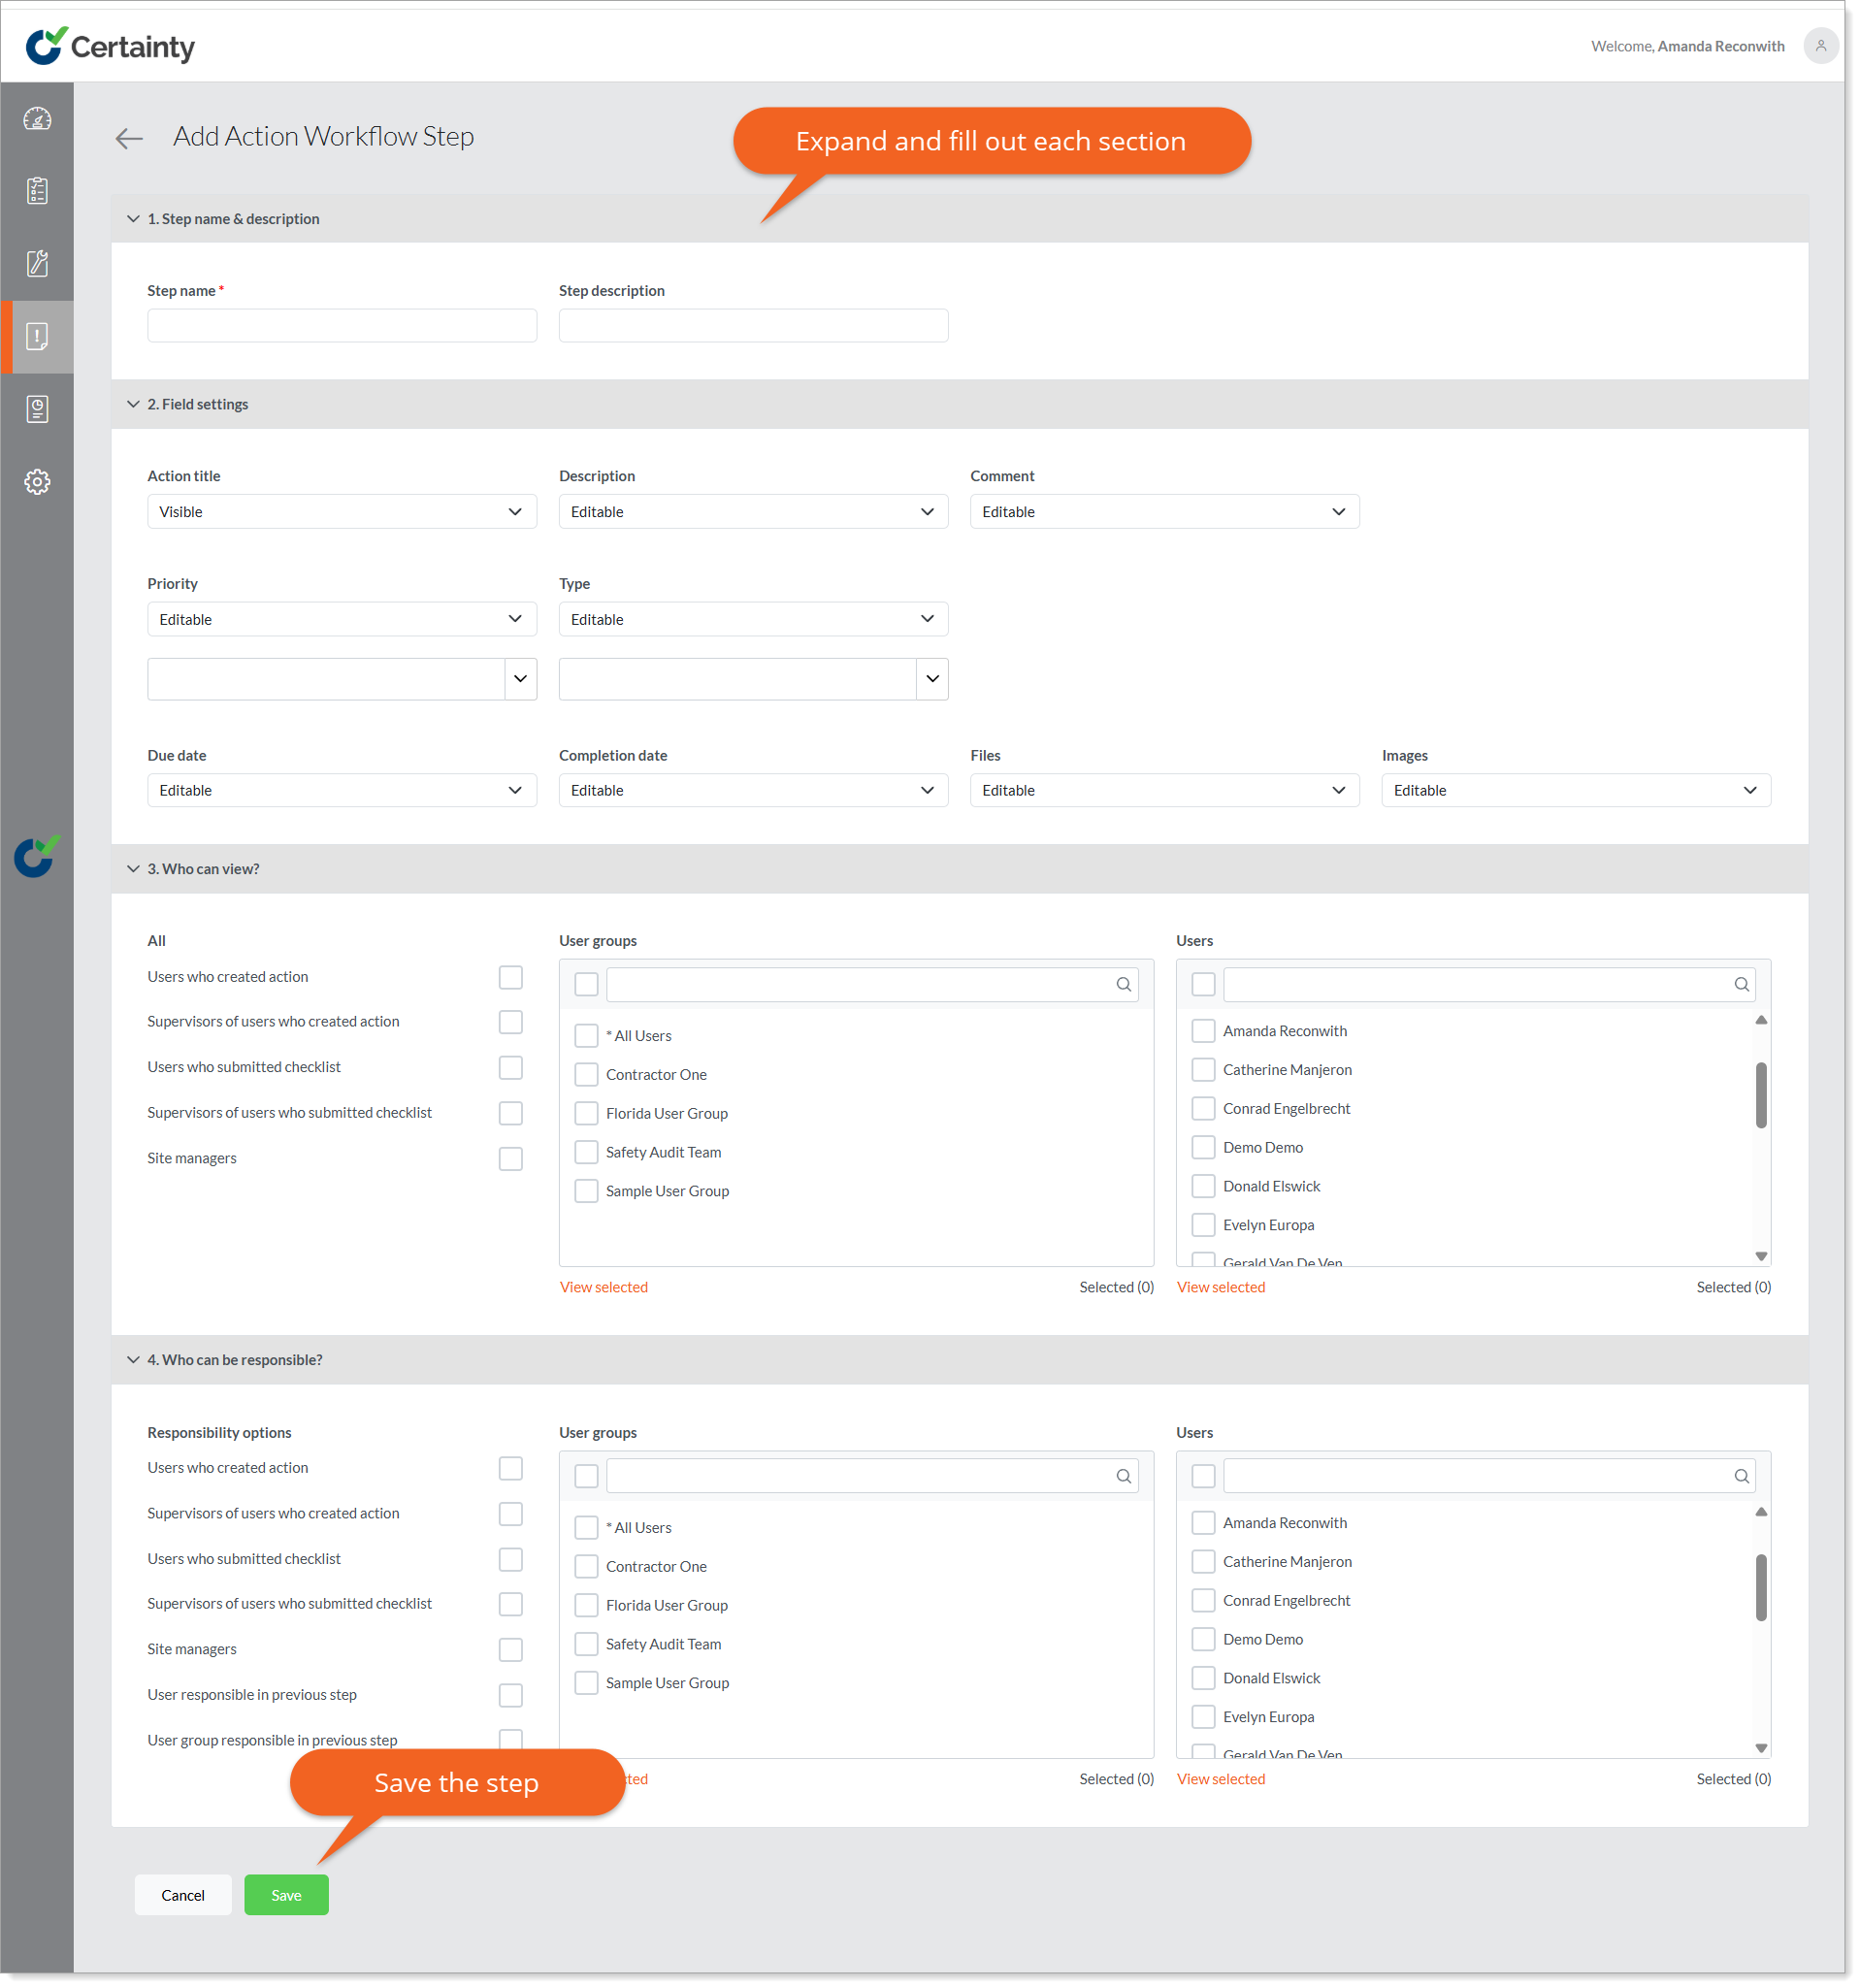
- Fill out the ‘Step name and description’ section. Each step needs a name and can be given an optional description. Descriptions will only be seen by Admin Portal users, not Mobile App users.
- Fill out the ‘Field settings’ section. You will need to decide how each field will behave in the Mobile App. The available fields each has 4 options: Hidden, Visible, Editable, Mandatory and Mandatory before next step.
- Hidden - that option is not shown to the user completing this step.
- Visible - the user can see the field but not make changes.
- Editable - the user can make changes to the field and add content.
- Mandatory - the field must contain content for the user to be able to finish this step.
- Mandatory before next step - this option will allow a user working on a step to save and return to that step without completing mandatory requirements, but it still enforces mandatory requirements before the user is allowed to move to the next step within the workflow.
- The first step of a workflow should have an editable Title, Description, Priority, and Type, since most users will look here to know what action they are supposed to take for the rest of the workflow
- Completion Date should be mandatory on the final step, since this date is what moves the action to a closed state.
- Fill out the ‘Who can view’ section. Any Mobile App users selected here will be able to see the action while it is in this step, but only responsible Mobile App users will be able to make changes or add content.
- Fill out the ‘Who can be responsible’ Any users listed in this section will be available as options to the user assigning responsibility for the action in this step, but if they are not selected here, they will not be able to interact with the action in this step.
- Click ‘Save’.
Once the steps have been created, you can move on to create an action workflow and add steps to it.
To create an action workflow and add steps to it:
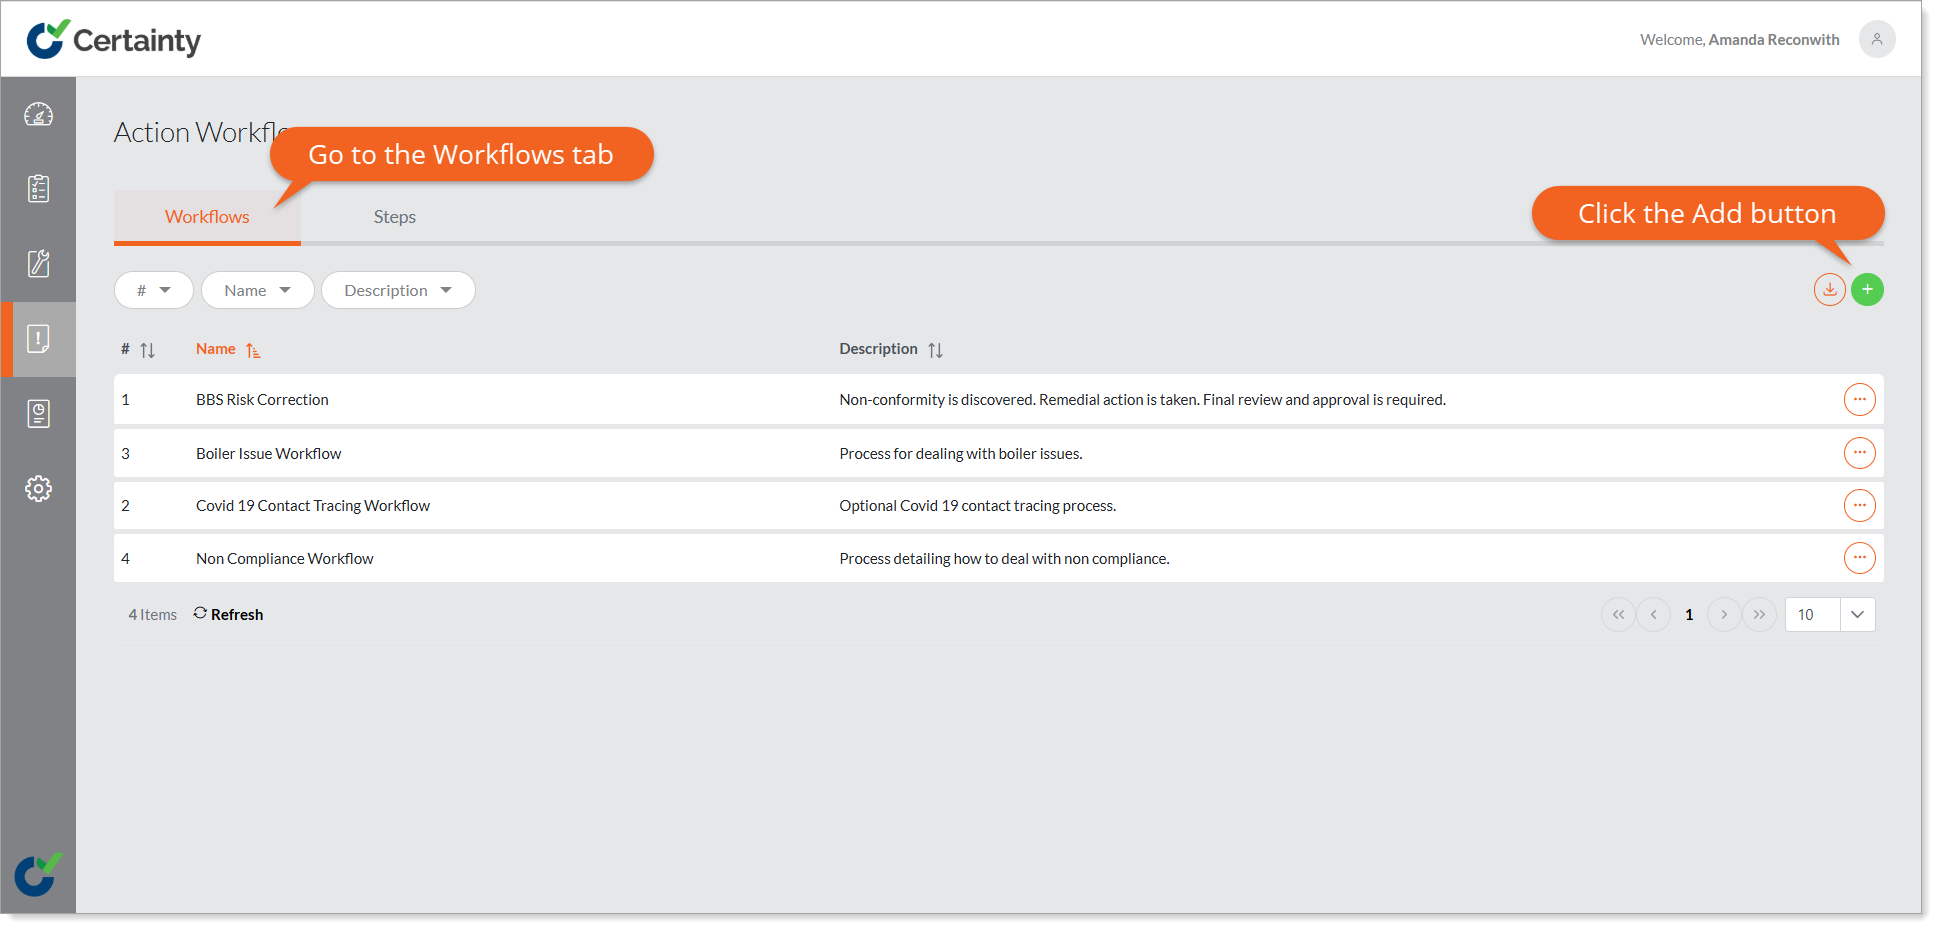
- Go to ‘Manage Actions – Action Workflows – Workflows’.
- Click on the green ‘Add’ button at the top right of the table to open the ‘Add Action Workflows’ page.
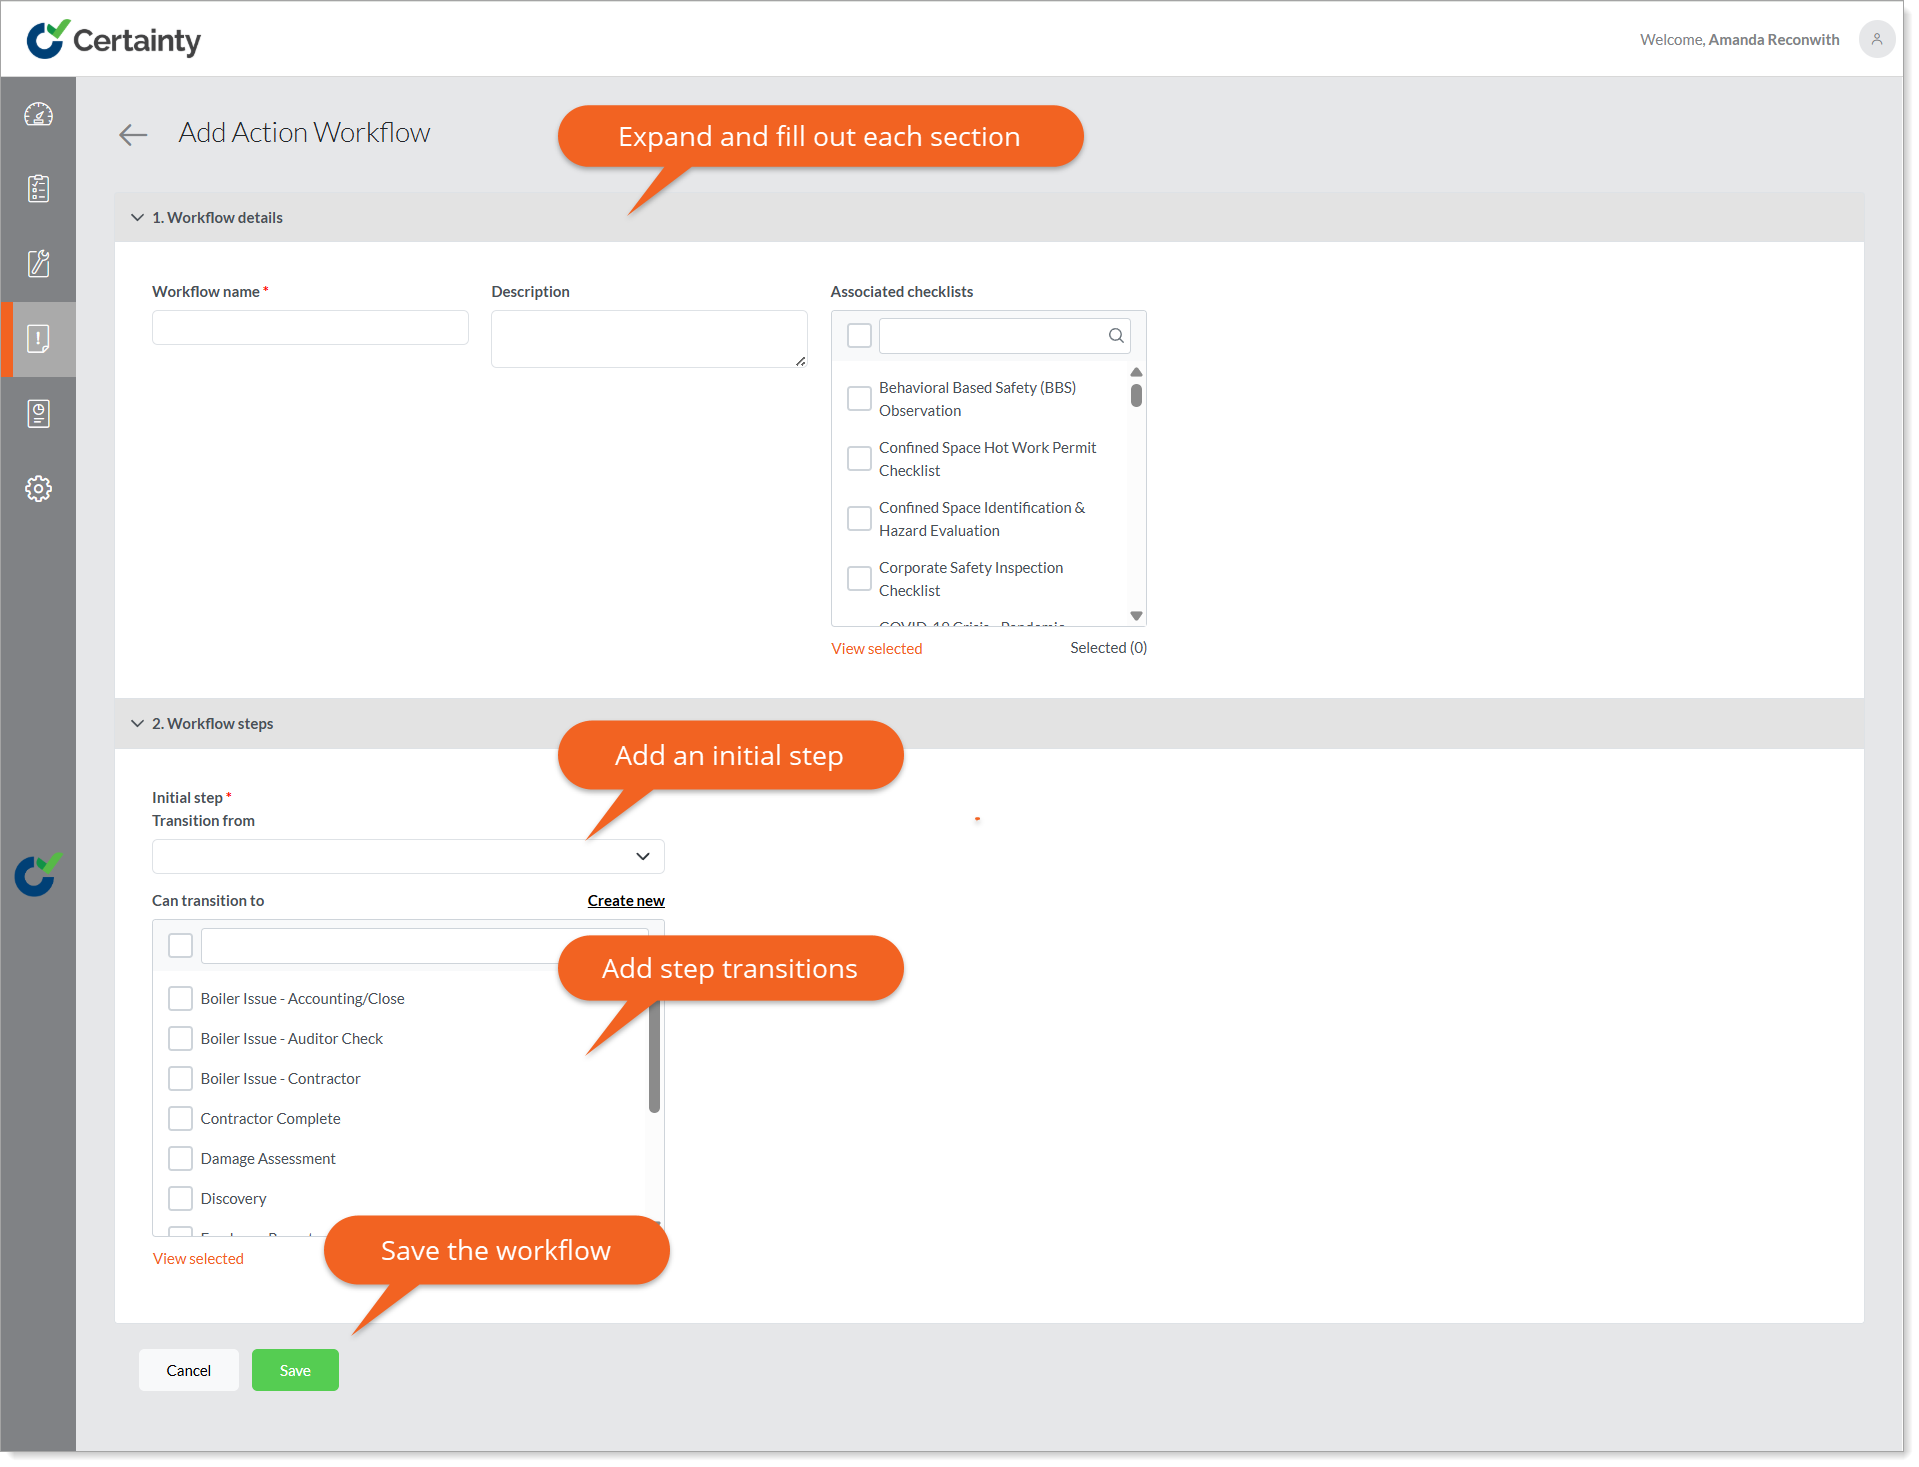
- Fill out the ‘Workflow details’ section. The workflow needs a name and can be given an optional description. Descriptions will only be seen by Admin Portal users, not by Mobile App users. You will also be able to assign the checklists where this workflow applies.
- Once you have assigned the relevant checklists, you will need to set up the step order and structure in the ‘Workflow Steps’ section.
- Expand the ‘Workflow Steps’ section.
- The first step in the workflow is the 'Initial step'. This is the first step that Mobile App users will see when creating an Action with this workflow.
- Now select which step the Initial step can transition to.
- Repeat this until you reach the last step in your workflow.
- A step can transition to several different steps, both forward and backwards in the workflow.
Example workflow with step transitions:
- Let’s say we select a step called ‘Discovery’ as our ‘Initial step’ in a workflow.
- ‘Discovery’ can transition to a ‘Remediation Assessment’ step, where a site manager will be responsible for assigning relevant employees to solve the issue.
- When the responsible employees have completed their task, they will pass responsibility back to the site manager transitioning from ‘Remediation Assessment’ to a ‘Sign Off Step’.
- The ‘Sign Off' step can transition back to ‘Remediation Assessment’ or forward to ‘Action Completed’. In our example the ‘Sign Off’ step is the only step in the workflow that has permission to edit the ‘Completion date’ field, so the site manager will have to approve and add the date for the action to be closed. If the site manager assesses the work done insufficient, they will have the option to pass back to the ‘Remediation’ step, adding any comments necessary.
- If the action returns to the ‘Remediation’ step of the workflow, the users responsible will then be able to read the comments added by the site manager, finish their task to satisfaction, and pass back to the ‘Sign Off’ step where the site manager can set a completion date, closing the action and move it to ‘Action Completed’.